For the longest time, if there has been any “industry standard” for stage management (there are far fewer than most people believe), it has been the “Up and Over” method for taping out a set. I’ll discuss that briefly for reference.
Up and Over, Briefly Explained
For this process, a stage manager picks a point somewhere on the stage, often where the center line meets the plaster line of the proscenium, and then measures perpendicularly up or downstage as well as over stage left or right, to find each point. That’s great if you have a good sense for perfect 90◦ perpendicular/right angles. Some of you may recall that I used to be in charge of setting spike marks for the Rockettes on tour, when we didn’t travel with our own floor. My spikes had to be exact down to ¼” accuracy. I would travel with lasers and T-Squares when I’d meet the crew in each new city. As a result I can eyeball perpendicular pretty well. Many people cannot.
I did see a recent video from the Practical Technical Theater DVD Series, where the person sets another upstage/downstage tape measure 10 feet to the left or right of the center line, and has the “over” tape go through this one to ensure the perpendicularity of the point. (I thought I made that word up, but it appears it’s real.)
If you have a great grid on your floor already (especially if they are exactly 1 foot squares) and a fairly “blocky” set that also has a lot of parallel and perpendicular lines, certainly this popular method can work for your tape out.
If you are brand new to taping a set, check out Kent’s video on Half Hour call for more, before I get into this other option of taping. (I’m also planning to update my blog with more on using an architect’s scale rule, but he’s got one link for now.)
In my experience, you’re set up to be inaccurate multiple times with the up-and-over method. You have to get the points right both when you’re taking them off the piece of paper (unless you use AutoCAD, Vectorworks or whatever digital program du jour – but hey there are now free reader versions of those at least) and also when you go to put it down in the rehearsal room. On paper, you are fighting your own pencil width sometimes, if you make any tick marks to show the “up” before you then measure the “over.” I used to use a T-square to judge my perpendicular as well, which I’ve found many stage managers don’t do. Then you have to be great at perpendicular perspective again when you transfer the marks to the floor. If you have floor boards or tile to follow, it can help eyeball perpendicular for placing the marks back down on the ground, but it really takes 4 tape measures to make each point exact, and that’s exhausting.
Option Two: Try Triangulation, or as I call it, Two-Tape
Quick hint – in a pinch, this person can be done by one person, though it’s easier with more folks. I’ve re-taped an entire groundplan by myself after rehearsal one night when it was discovered we really did need to have more room upstage in the rehearsal hall.
Before you start plotting points, first figure out how you are going to fit in the room. No use basing your points off something that won’t actually fit in the room.
The “math” of Triangulation
Getting the concept of Two-Tape can be tricky to comprehend, but ultimately can be much more precise. You’re going to pick two points on your groundplan, instead of just one, and then measure every point of your groundplan from both of those two. If you pick two points on the center line, then there are only two places those lengths will touch each other to form the third triangle tip, or plotted point: stage left or stage right.
We’re going to talk Geometry here. Stay with me.
Remember a 3-4-5 triangle? I’ll start with that easy visual, which starts with one corner at a right angle.
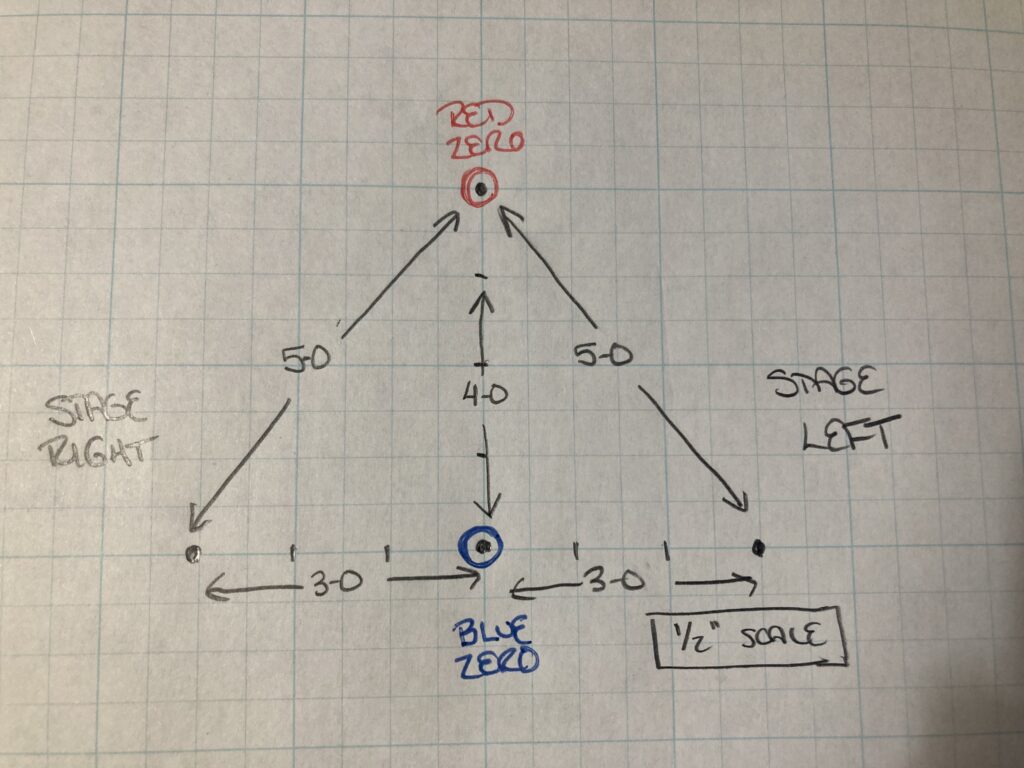
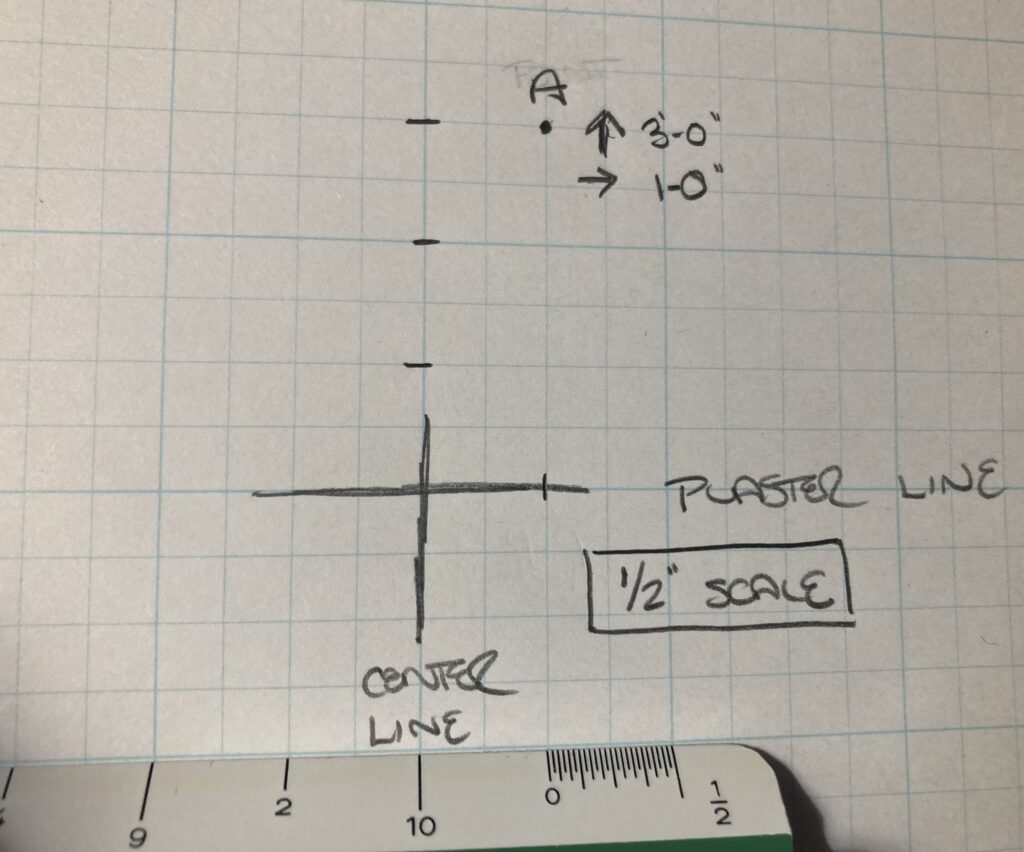
In this example, I’ve placed my two zeroes 4 feet apart on the center line. I love using Frixion erasable pens for this, and label one as my “red zero” and the other as my “blue zero.” If I measure 3 feet from the DS Blue Zero, and 5 feet from the US Red Zero, the only possible choices to complete that triangle and make a point is found on either side of the center line. In this case, that location is exactly perpendicular to the center line, on what could be our plaster line, at 3 feet out.
Need a video visual of how the tape measures meet? Check out the 7 minute mark in this video from Kent Collins.
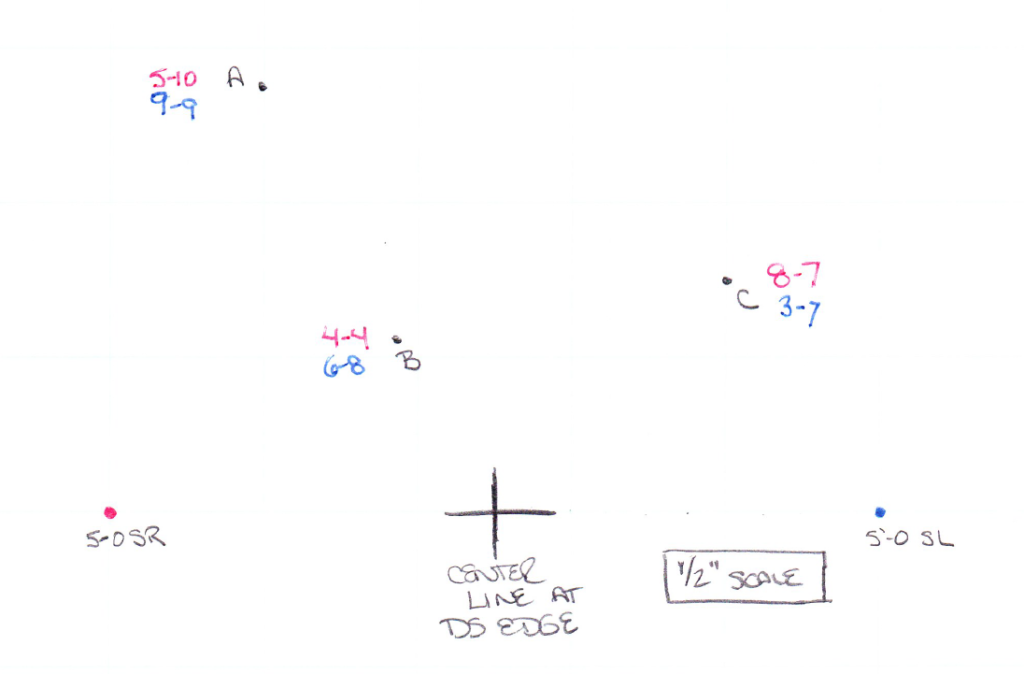
Now we’re going to pick things that aren’t at nice perpendiculars. I just made some random dots on paper to show you. This time, I chose two downstage points, the same distance from center. For a ballet, these would be the equivalent of my two quarter marks. In this case, there is no confusing which side of the stage we’ll be plotting. Every point will go upstage of these two, and we’ll only have one choice.
First, I go through and measure everything from my red zero. This is so much faster than up-and-over because you don’t have to guess if you’re getting the correct perpendicular off center and then the correct perpendicular off stage right. You’re less likely to screw up by the width of a pencil, too. You are literally just measuring the distance between two points, wherever they are. Also, you can attack every single point with one color, then go back and get the other. We’re already saving time and being more accurate.
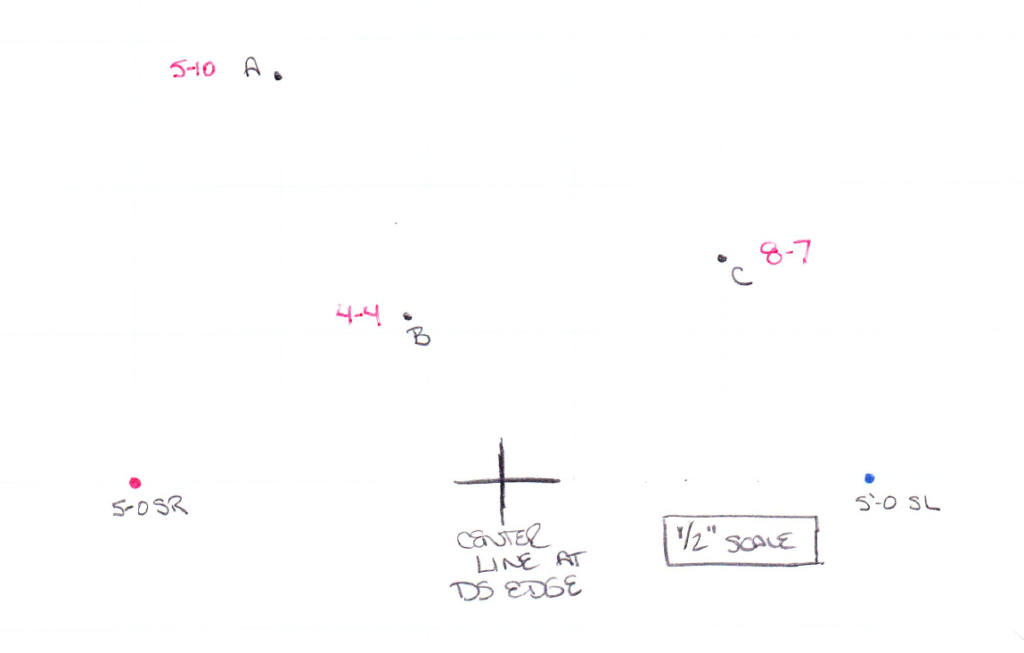
Here I’ve measured out points A, B, and C from the stage right Red Zero. I just write the number in that color by each point since they aren’t crowded next to each other. If they had been close to each other, I might have created a table with three columns: Letter, Red, Blue.
I didn’t have to remind myself what direction, like upstage or stage left. I just wrote a number. Well, two numbers – feet and inches.
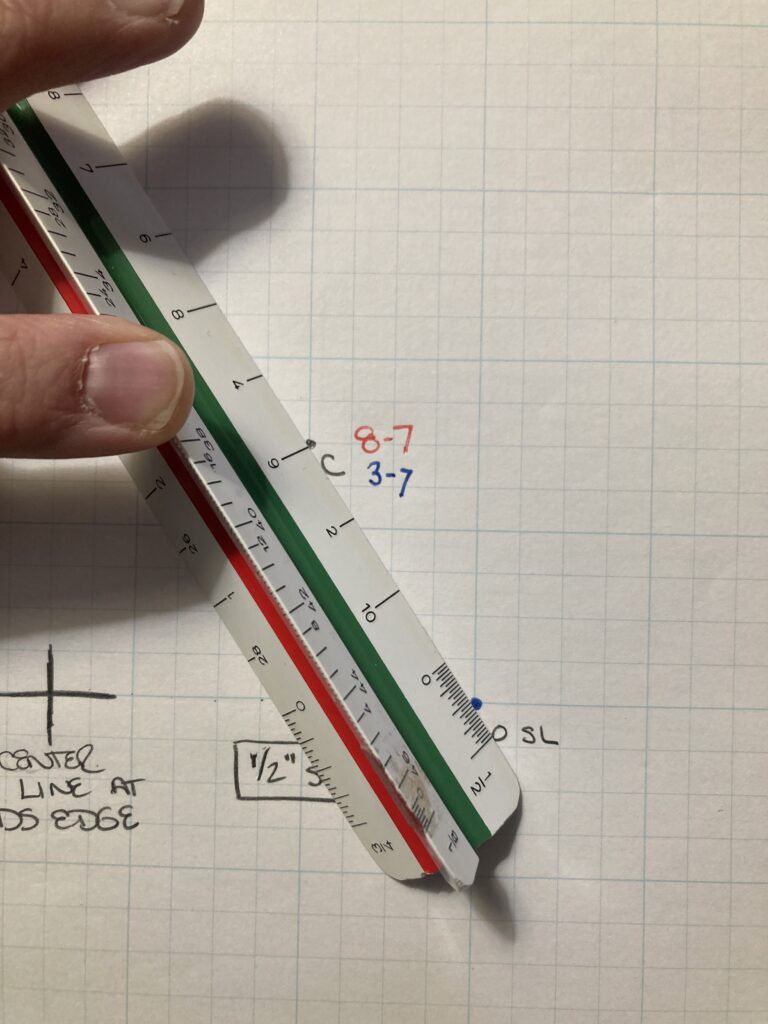
Now I go back and measure the same points from the stage left Blue Zero.
To show you how mirroring points works in each quadrant of a set, I’ve added this visual.
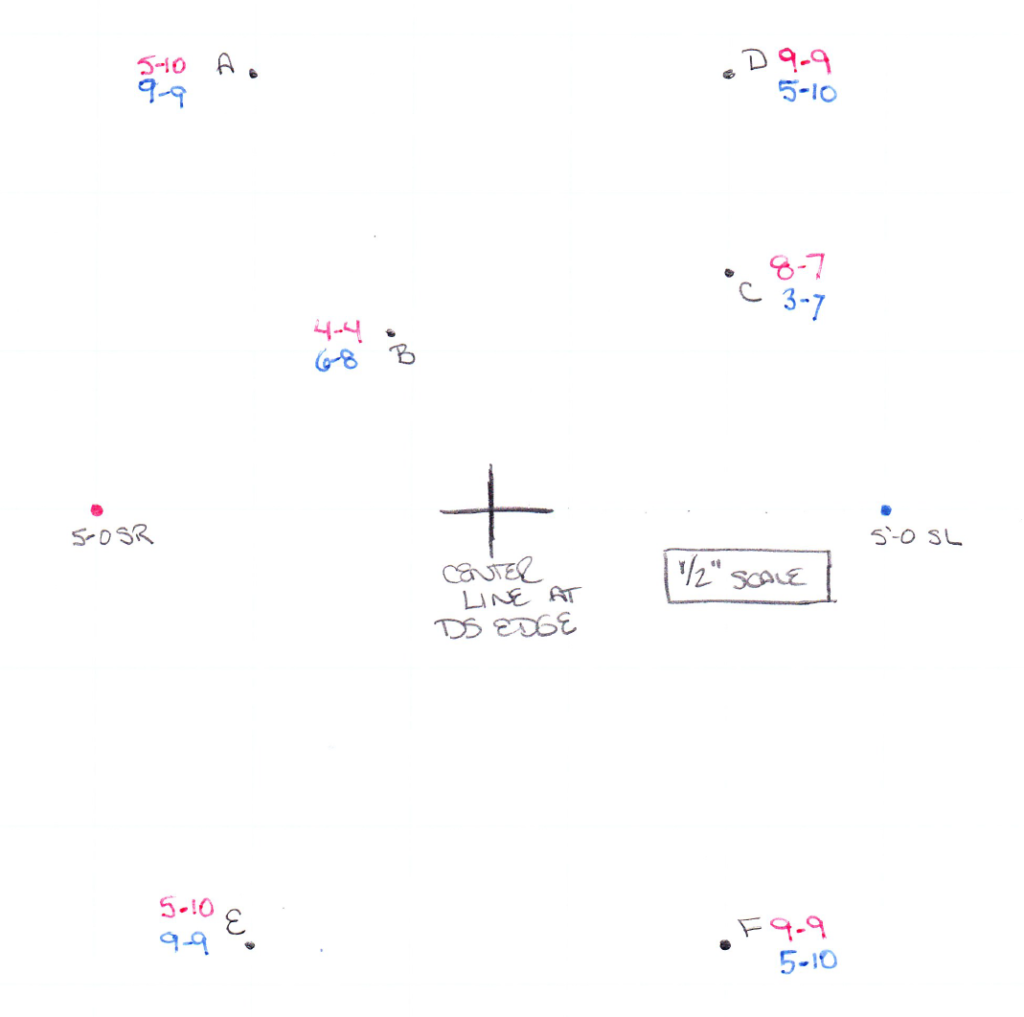
Above, Point D is the mirror image on stage left, of the stage right Point A. Since we picked zeroes equidistant from center, the red and blue numbers have been flipped. Then to go back to our explanation of how you DO have choices if you consider the other side of our zeros (in this case, out in the audience), note how the numbers correlate for Points E and F below the zeroes, compared to Points A and B.
Which zero points do I pick?
It depends on the set design and your space. For a ballet, as mentioned, I choose the two downstage quarter marks. I’ve also used downstage center and another point straight upstage of that by 20 feet. On my recent show, there was a rectangular edge to our set, and I picked the two downstage corners of it. Whatever you pick, you want it to be something you can use again onstage, with no obstructions. Think about whether you may need two different sets “zeros” if you have a multi-platform set, and you certainly don’t want anything that would make you have to go through a wall to find a point.
Part Two of this series will discuss how to actually translate this to your floor!
More Thoughts
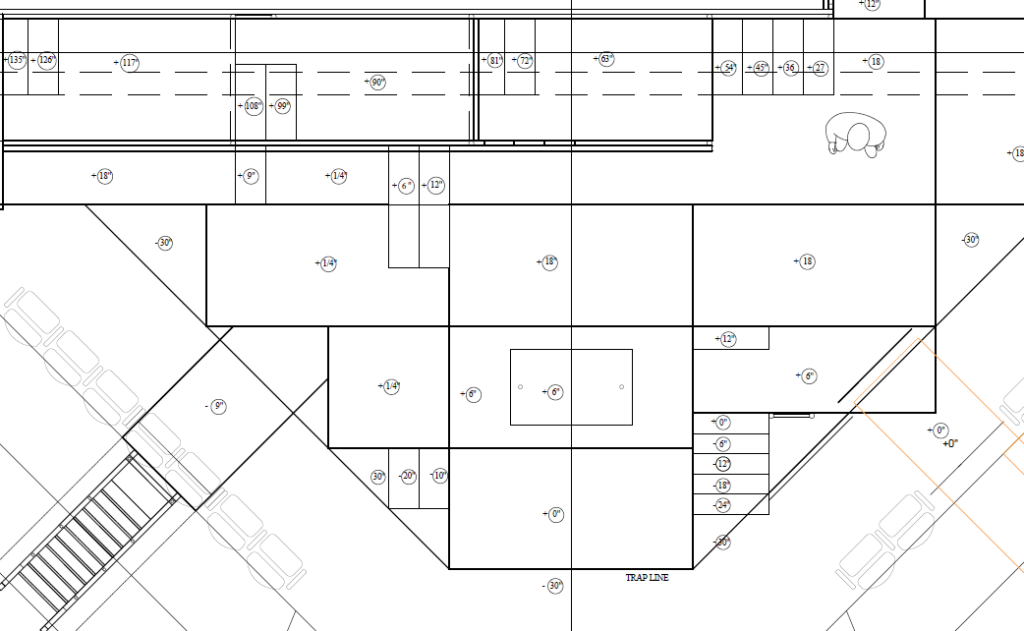
I’ve created a downloadable exercise to compare up-and-over and two-tape triangulation for the same points, and why one version might be just fine if you have a gridded floor and can do well getting perpendicular points as well, but also how hard it can be to find perpendicular.
Check out more of the topic with Kent Collins’ Half Hour Call: Kent has a 14-minute video for lots of thoughts on taping out sets, including choosing your points. About five minutes in, he discusses Up and Over first, and then a minute later he discusses Triangulation.
Visit more blog posts tagged with “Taping the Set.”
Learn more about dance quarter marks.