Okay, you’ve got your set of dance numbers ready (see previous blog post), but have to put them on a set with a curved front edge. Observing other stage managers, I’ve learned the proper way to do this may not be intuitive for some.

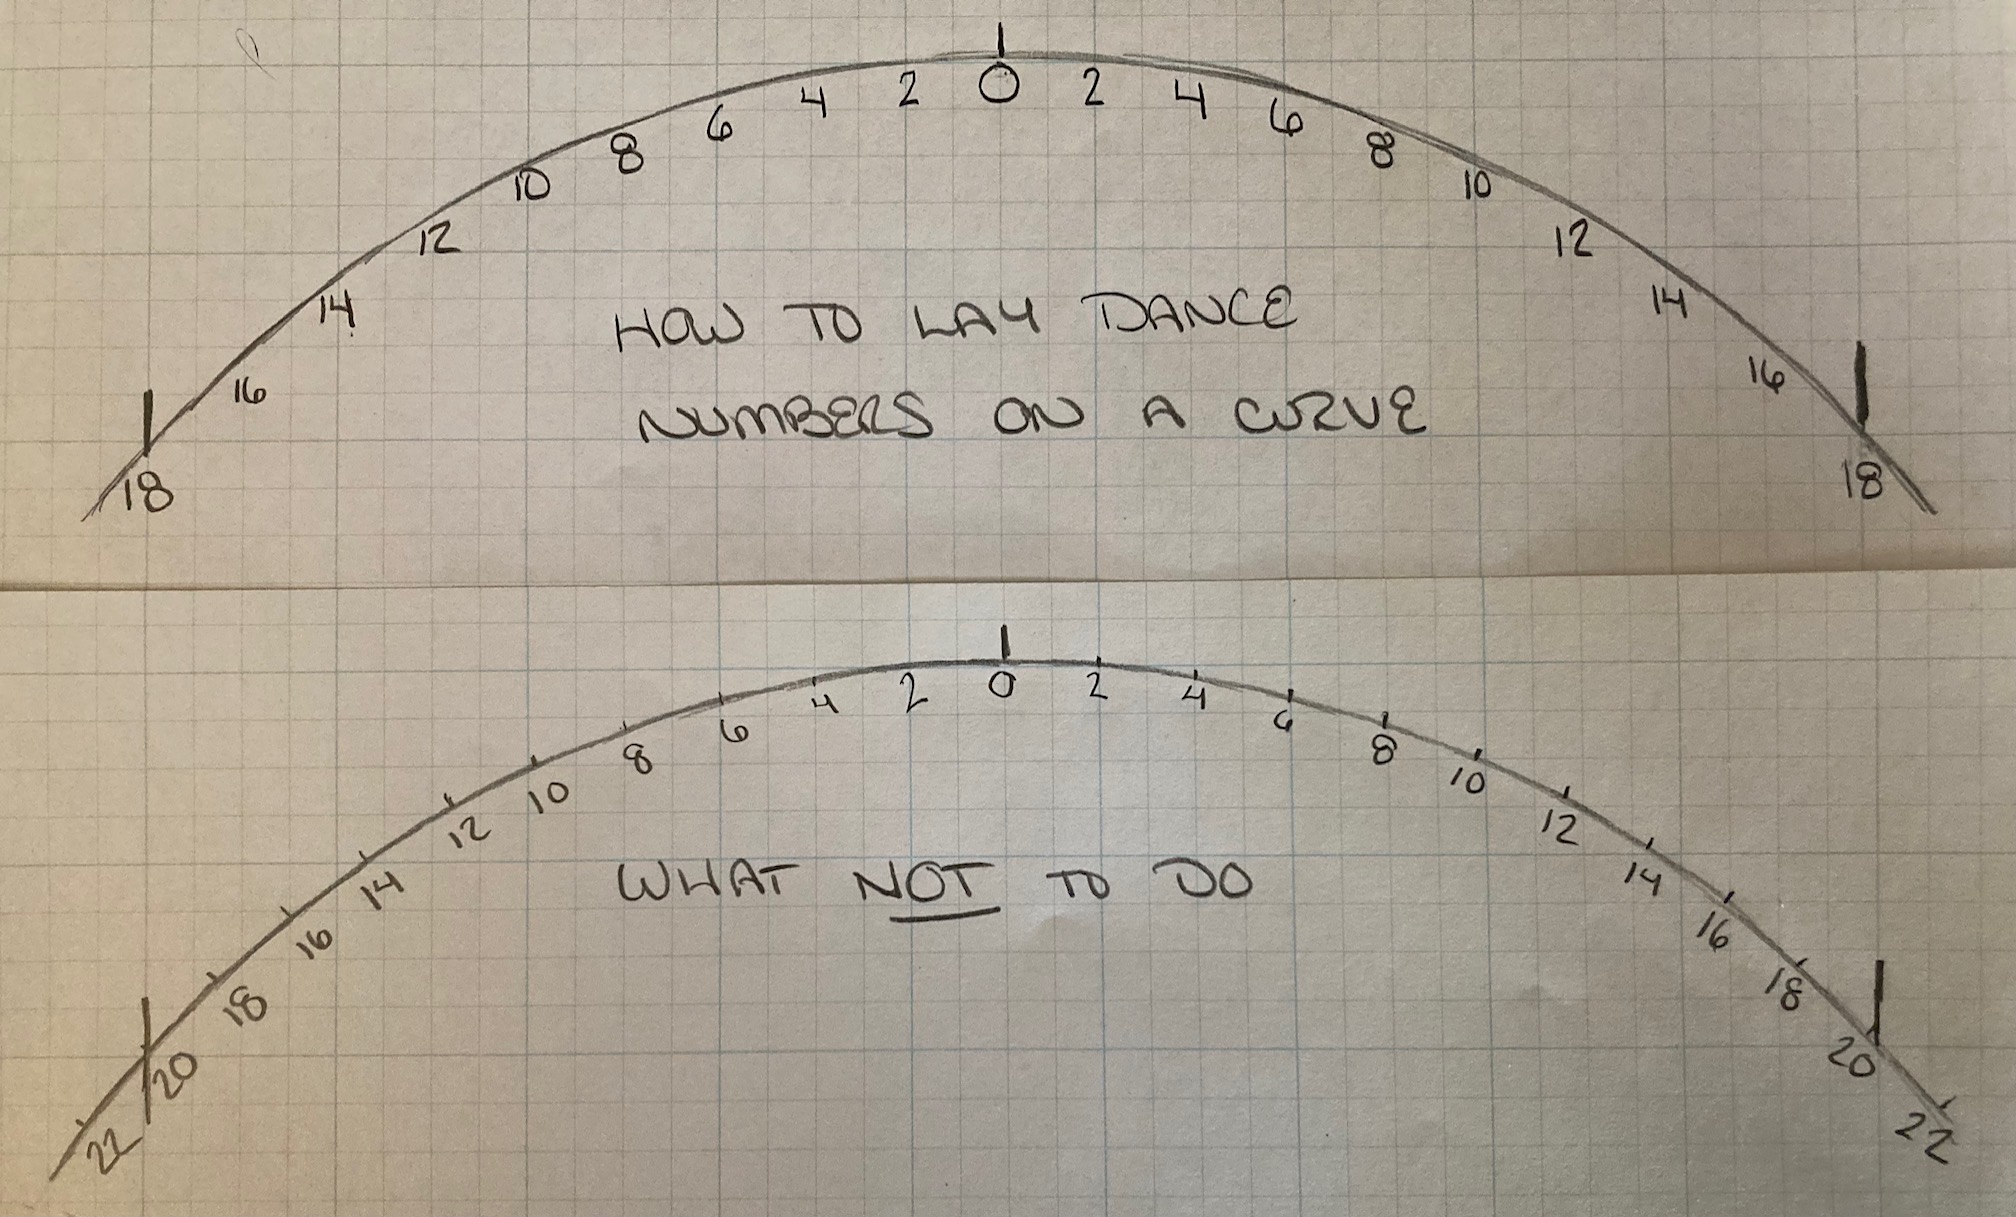
The most crucial aspects are to make your marks from the center line – not from another number – and orient them directly upstage/downstage, not angled along the curve. The image above is what you are going for.

In the second image, measurements were taken going around the circumference edge of the stage. (I used another piece of graph paper to measure two squares along the edge, for reference.) You’ll notice that at first the numbers are pretty similar, but eventually it’s off an additional two feet each side when the number 20 is placed. Geometry is the answer of why this doesn’t work.
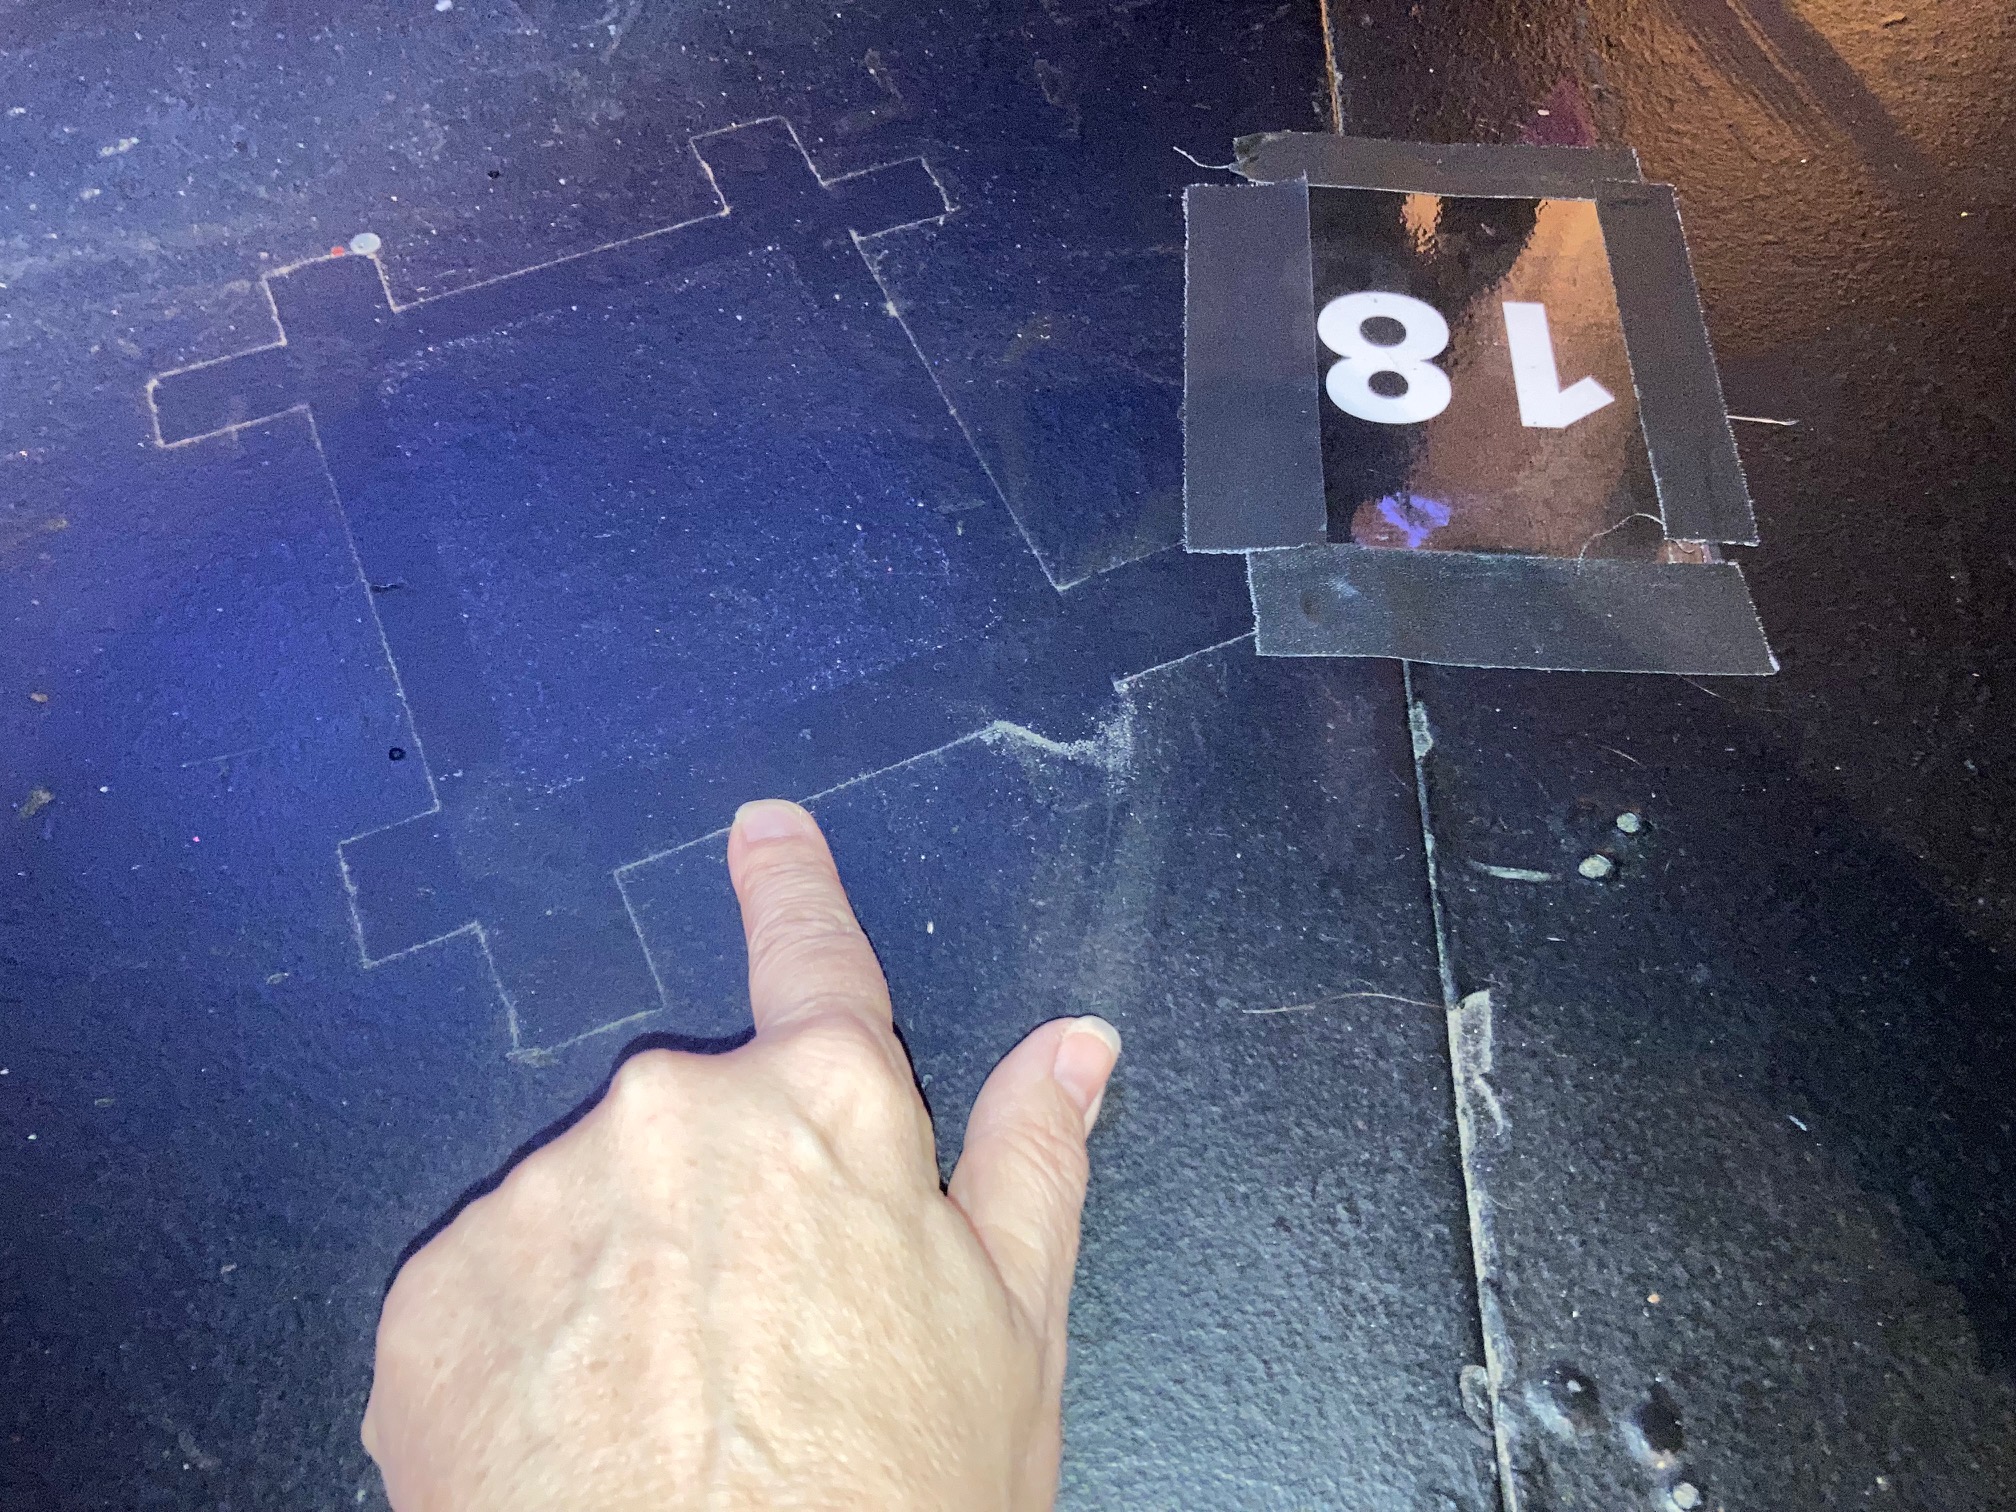
Below is an example of how far off the number 18 had been placed by a previous stage manager. The house gave me permission to re-tape them, much to the happiness of my choreographer.

You’ll also note the difference in the orientation/angle of the numbers themselves. Picture yourself as a dancer or actor looking at the numbers. I’ll put them here again, positioned above each other. Look how different they are to follow. Where would you stand to be “on 12”?

The bottom picture messes with your eyes and is a lot harder to figure out which number you’re on. In the case of the Rockettes I worked with, they would have started angling their bodies to center up with the numbers – we had to make sure our numbers were placed DEAD ON horizontally, including our two stickers even with each other for the double digits. Oh, the number of times I had to reset our initial set of numbers! After that we would Marley tape over them well to hope they did not need to be replaced from scuffs and tap shoes. Luckily, I think I always had a flat edge to our stage. Amazingly, we didn’t travel with our own deck at the time, either.
It can also be hard to eyeball perpendicular for some to make your numbers truly right, but you’re aiming for the top picture. Feel free to use a T or L square to assist you as well. And definitely use any seams in the floor to assist you (if they are parallel/perpendicular!).
Edit, since I was asked “Only question is how do you measure from zero on a curve with a tape measure?! 😭 #notamathkid”: Keep measuring from the center line, just pick a spot further upstage for each number as needed. Feel free to use a T or L square if needed, to help you keep the tape perpendicular. Or, there’s a handy right angle at the edge of every piece of standard paper too.
Help Your Choreographer Out Front
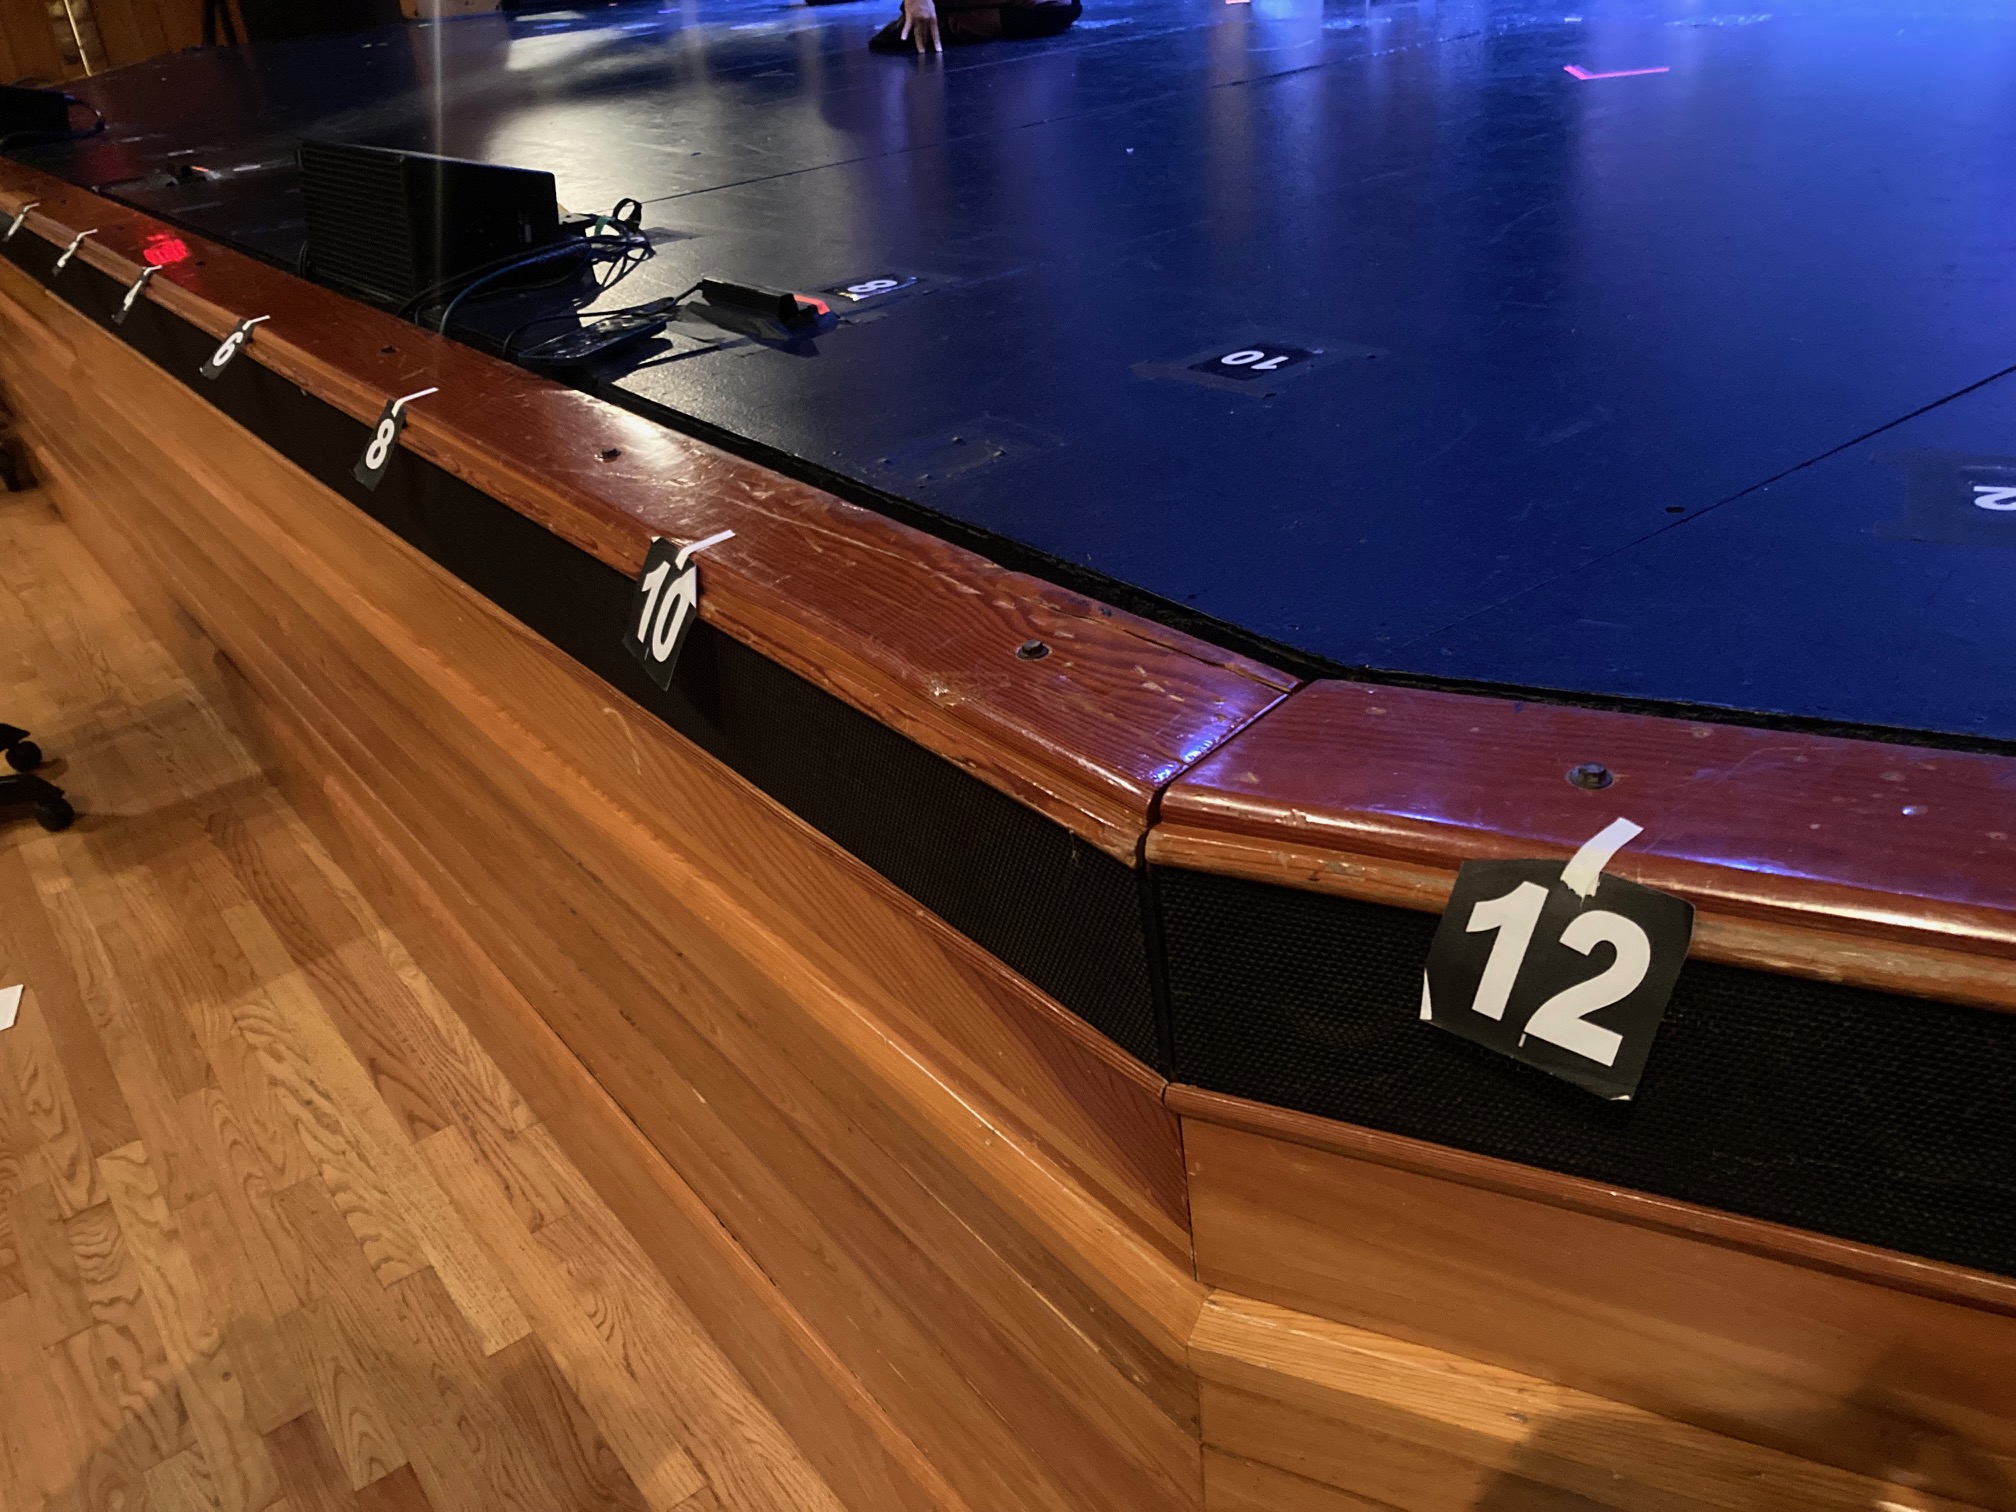
PRO TIP: Add an extra set of numbers to the front of a raised stage during spacing and tech rehearsals for your choreographer. You could make tabletop-tent versions that can be seen both sides, but you don’t want the performers to get used to those. Instead, tape them to the front edge of the stage, visible from the house. Make sure you use something that won’t damage the stage floor or molding edge – spike tape or blue painter’s tape might be your best bet. Remember to remove them by the time you get an audience!

Have fun setting up your dance numbers!